Sprouting is far easier than you think. With as little as five components needed, you might wonder how you ever bothered purchasing sprouts in the market before. The benefit of sprouting gives you a great way to enjoy fresh, high quality produce throughout the year. You can read everything you need to know about the benefits of sprouted grains here.
It requires surprisingly little effort, and it takes up very little space in the kitchen. Any whole or unbroken seed can be sprouted, and after trying a variety you will quickly land on your favorite type.
Getting Started
While there is more than one method used to sprout, we have found the one we feel is worth sharing. To start you’ll need:
Wide mouth glass jar
A screened lid
Room temp water
1/4 cup grain/seed/beans like chickpeas, barley, or lentils
Strainer
Day 1
Using this method, you’ll want to start off by pouring the seeds into your glass wide mouth jar. Follow this step by adding double amount in water as there are seeds. Cover your jar with a cloth and place in a mild temperature room to soak for 12 hours.
Day 2
Using a strainer, pour the water and seeds out. Rinse thoroughly. (If your water has changed color during the initial soak, this is normal) After the rinse is complete, add your seeds back into the jar. Cover with screened lid and tilt jar upside down at a slight angle.
(NOTE: You want your jar to be securely placed upside down at an angle so that the residual water can drain. The most common mistake people make in sprouting seeds is not draining them adequately which results in rot.)
Day 3
By now you should see signs of sprouting or already have early stages of sprouts. Without removing the screen, pour water into your jar covering the seeds with water. With the seeds still in the water, swirl the jar in a circular motion several times making sure the seeds are thoroughly rinsed. Again, with screened lid still on, drain all excess water out. Place drained jar securely upside down at an angle once again. Repeat this step 2x a day or every 12 hours.
(NOTE: as you will be repeating this rinsing and draining step 2x a day for 3-5 days, the drained water can be used to water your indoor plants.)
Day 4-5
The following days you will continue by repeating the steps on day 3. By day 5 most seeds will be fully or significantly sprouted. Your sprouts will likely have filled the jar by now. You can decide to enjoy them now or continue the process to your desired length.
Enjoy your brand new homegrown produce for breakfast, snack, lunch or dinner. Sprouts are wonderful added to eggs, breads and muffins, salads and grain dishes. If you’re not sure where to start, the ever classic sprouts on a sandwich is always a delicious choice. Sprouts are not only delicious, but are living foods with an increase in vitamin content and enzymes providing health and a full stomach.
Here are our top rules every baker should know before starting their baking journey.
Everyone knows baking is a science. There’s a rhyme and reason for each ingredient, and each method has a purpose. Some recipes take multiple trials and tribulations to develop. While some things can be adjusted willy-nilly, others would be disastrous if deviated from the recipe. To reduce the risk of failure in your baked goods, there are some rules every baker should follow. Here are our top 8 basic rules everyone should know when starting their baking journey.
1. Read The Recipe BEFORE Baking
Read it once, twice, or even three times to fully understand the recipe before starting. Doing so is especially important when baking something you haven’t made before. Make sure you fully understand each method and do the research when you don’t.
2. Mise En Place
Mise en place is a French culinary term that means “putting in place.” Before baking, always make sure you have all the ingredients needed. It’s better to do so now than halfway through the recipe only to realize you only have two eggs instead of the necessary three. Prepping in advance helps ensure you have all the correct ingredients available, so you don’t have to look for replacements in a hurry leading to significant errors.
3. Measure Accurately
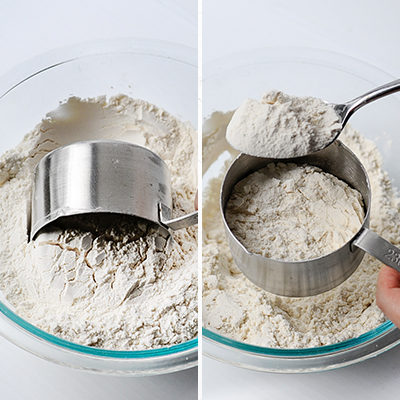
Baking is a science; precise measurements are crucial to achieving the desired results. Make sure you use measuring cups and spoons or weigh your ingredients when necessary. If using volume measurements, make sure to do so correctly. For example, flour should be spooned into the measuring cup and leveled off, or you risk the chance of adding too much flour. Another thing to remember is that dry ingredients are measured differently than wet ones. Make sure to use a liquid measuring cup for ingredients like water, milk, cooking oil, and even yogurt. The reason to use liquid measuring cups is that liquid has a curve. This curve is referred to as the meniscus. Be sure to add enough liquid to align the bottom of the curve with the measurement needed. Check out our favorite tips to learn more about accurately measuring wet and dry ingredients.
4. Don’t Make Substitutions Lightly
We know it’s easy to get carried away with wanting to make a ton of substitutions. We’re all for making a recipe your own, but not everything has equal substitutions. Knowing how to appropriately substitute ingredients can help you adapt recipes to your wants and needs. For instance, there are many different flour types, all of which have different proteins and will affect the texture and height of the final product. Some sweeteners have more liquids than others; even changing the fat type can affect your baked goods. We recommend doing the research and substituting one ingredient at a time. If you want to change more than one ingredient, we recommend looking for another recipe better suited to your needs.
5. Control Your Temperature
Pay attention to the temperature of your ingredients and your environment. Use room temperature ingredients for even mixing and baking. Make sure to give your oven enough time to preheat and reach the right temperature. That said, ovens can vary in temperature, so it’s essential to calibrate your oven to ensure accurate baking. We recommend using an oven thermostat to get the most out of your baked goods.
5. Use The Right Tools
Use the right tools for the job. Something as simple as pan size can change a lot. Make sure you use the correct tools specified in the recipe.
6. Mix Properly
Different recipes require different mixing methods. Understanding the differences between stirring, beating, whisking, and folding will help you achieve the right texture for your baked goods.
7. Be patient
Many baked goods require specific timing and patience. Always start with the shortest recommended baking time and then check for doneness. But be sure to wait to open the oven door until then. The quick change in temperature will dramatically impact your baked good if you open the door too soon.
8. Take Notes
We love to take notes once it’s all said and done. How does it taste? How long did it need to bake? Would you make any changes? Taking notes helps you see what worked and what didn’t. It helps you learn how to better yourself and your baked goods. For us, this is the most important rule – never stop learning!
As you can see, baking is a science, but it’s not complicated. By following these essential rules, you can feel confident your baked goods will turn out well. Even if they didn’t, you can now know what adjustments must be made. Baking is a journey; once you get a hang of it, it’s one of the most rewarding journeys anyone can take.
Let us know if you think there are any other important baking rules we should follow!
Our favorite tips and tricks for measuring ingredients accurately.
Whether you’re a novice baker or an established cook, knowing how to measure ingredients accurately is crucial to making delicious and consistent recipes. When measuring ingredients, there are two basic types: dry and wet. Measuring them correctly can make a big difference in the outcome of your dish. Here are our most helpful tips on accurately measuring dry and wet ingredients.
Dry Ingredients
Dry ingredients include flour, sugar, cocoa powder, and spices. Measuring dry ingredients accurately is essential, as even slight variations in amounts can affect the outcome of your recipe. Here are some tips on measuring dry ingredients:
1. Use the Correct Measuring Tools
When measuring dry ingredients, use measuring cups and spoons specifically designed for dry ingredients. These tools are usually made of metal or plastic and have flat edges that allow you to level off the top of the ingredient.
2. Use the Spoon-and-Sweep Method
Using a spoon to measure flour, fill the measuring cup, and then level it off with a straight edge. Do not pack the flour into the measuring cup, as this can result in more than is called for in the recipe. This method is also suitable for measuring powdered sugar and cocoa powder.
3. Weigh Your Ingredients
Using a kitchen scale to measure dry ingredients is the most accurate method, as it accounts for variations in density. Weigh the dry ingredients using a digital scale and add or remove until the desired weight is achieved.
Wet Ingredients
Wet ingredients include water, milk, oil, and eggs. Measuring wet ingredients accurately is crucial as it affects the texture and consistency of your dish. One common phenomenon that can make measuring liquids challenging is the meniscus. The meniscus is the curved surface of a liquid that forms when it comes into contact with a container. This curve is why you measure dry and wet ingredients differently. Here are some tips on measuring wet ingredients accurately:
1. Use a Clear Measuring Cup
A clear measuring cup is essential when measuring liquid ingredients. It allows you to see the level of the liquid and the meniscus.
2. Fill On A Flat Surface
Before measuring, place the measuring cup on a flat surface to ensure it is level. This will make it easier to see the level of the liquid and the meniscus.
3. Pour Slowly
When pouring the liquid into the measuring cup, pour slowly and steadily to avoid splashing or spilling. Stop pouring when the liquid level reaches the desired amount.
4. Read the measurement at the bottom of the meniscus
To get an accurate measurement, read the measurement at the bottom of the meniscus. The bottom of the meniscus is the lowest point of the curve.
5. Use a Scale
Measuring wet ingredients by weight is also accurate. Weigh the wet ingredient using a kitchen scale and adjust until the desired weight is achieved.
Measuring ingredients accurately is essential to cooking and baking. Be sure to use the correct measuring tools, spoon-and-sweep method, or weigh your ingredients when possible. When measuring wet ingredients, be sure to keep the meniscus in mind. By following these tips, you can ensure your dishes turn out perfectly every time.
Let us know if there are any other baking basics you’d like to learn more about!
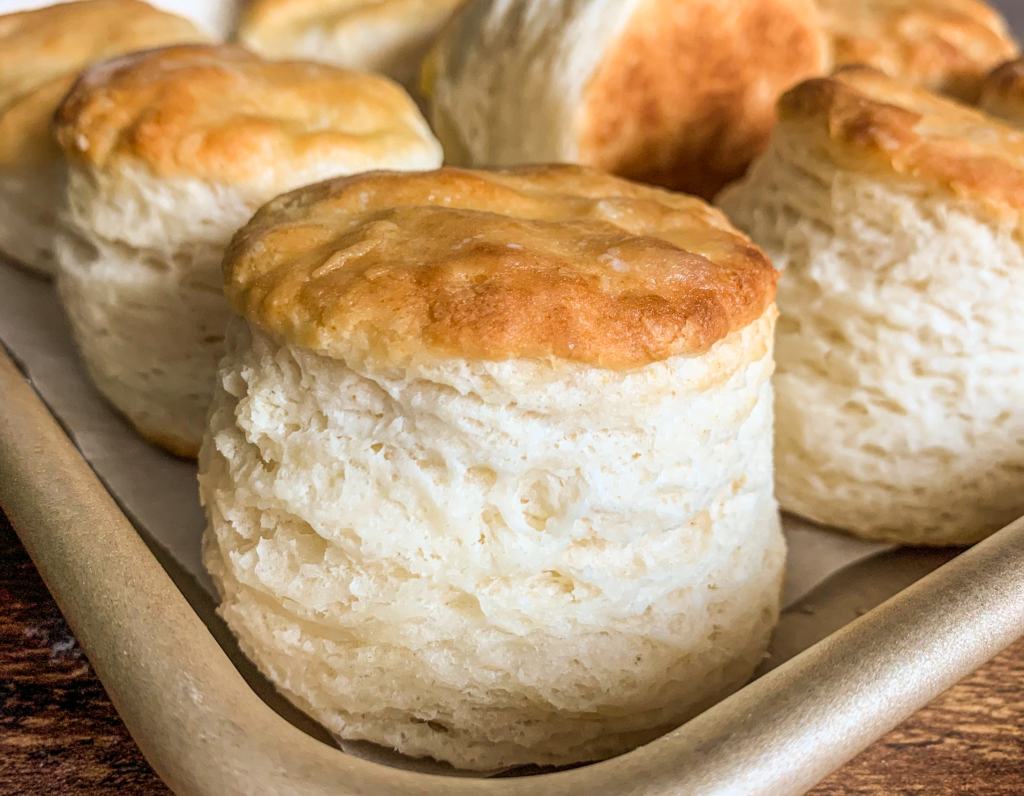
Have you ever eaten a freshly baked biscuit? Those kinds of biscuits that are buttery, flaky and pull apart layer by layer… We may be drooling over here just thinking about it.
I’m here today to give you our four best (and essential) tips for the most perfect biscuits that you and your loved ones are sure to thoroughly enjoy this holiday season!
Tip one: cold, cold, cold!
To ensure your biscuits are baked with the perfect flaky layers of butter– we need to make sure that your butter and milk are ice cold throughout the entire process. A huge bonus tip is to throw your mixing bowl with all your ingredients into the fridge or freezer for 10-15 minutes in between the baking steps to ensure that the fat (butter) doesn’t melt and seep out while baking.
Tip two: stack your dough multiple times
Once you’ve formed your dough into a rectangle, most recipes call for you to cut the dough in half and then stack them onto one another and then repeat that process at least twice. Our recommendation for the utmost of buttery layers– gather your dough, cut it into 4ths, stack them onto one another and repeat this process twice. This way you’re getting 8 layers or more rather than just 4. The results are perfect and in our opinion– so worth it.
Tip three: don’t twist your biscuit cutter!
This is a crucial step as it can “seal off” the layers and squish them into themselves. Twisting prevents the biscuits from being able to rise properly and inhibits the puff that creates height. It’s important to create a smooth cut with no twisting. To cut, press straight down on a metal biscuit cutter or– alternatively, if you don’t own a biscuit cutter, you can also use a sharp knife or bench scraper to cut them into squares.
Tip four: leave your dough thick
This tip is our favorite. Make sure that when it comes time to cut your biscuits, you’re cutting them at 3/4 of an inch tall. Any dough that is thicker than that will result in biscuits that topple over half way through baking– making them wonky and not so picturesque. Thinner dough may result in flat, crunchy biscuits. Throughout our years of biscuit making, 3/4 of an inch has been shown to yield the perfect height in a biscuit.
Now that you have all the knowledge for the perfect biscuits, we hope your baking experience is made easier this year and that it yields the best results possible. Let’s be honest though… flaky or not, biscuits are delicious any way!
If you’re just starting your baking journey, there are a few should-knows about certain ingredients. Baking is a science, after all! Whether you’re making cookies, brownies, cakes or muffins, there are differences in many ingredients that you’ll choose to bake with based on what they do in a recipe. Today, we’ll be learning about the key differences in cocoa powders. These are not the only cocoa powders but these are the most commonly used amongst home and professional bakers. Let’s dive into the world of cocoa!
What is cocoa powder?
Cocoa powder is produced from leftover roasted cocoa bean particles once cocoa butter has been extracted. It’s an unsweetened chocolate product that adds deep chocolate flavors to many baked goods, desserts and beverages.
What is natural cocoa powder?
Natural cocoa powder is just that. Natural cocoa powder from roasted cocoa beans. It has a lighter, medium brown color. It’s higher in acidity, with a PH level of 5.3-5.8. It yields a fruitier and more astringent taste.
What is Dutch processed cocoa powder?
Dutch processed cocoa powder, or alkalized cocoa powder, is simply cocoa solids that have been treated with an alkalizing agent to reduce the natural acidity. Dutch processed cocoa powder has a PH level of 7 making it a neutral product. Alkalizing cocoa means a darker color, more mellow & smooth in flavor and dissolves more easily into liquids. If you think about how an Oreo cookie tastes, the uniqueness of it, it’s a direct result of using the Dutch-processed cocoa powder.
When should you use each one in a recipe?
We’re glad you asked! When using cocoa powder in any sort of beverage like hot cocoa or in a pudding recipe for example, either one is interchangeable. Meaning, you can use either cocoa powder in any of those types of recipes depending on your flavor preference.
If you’re going to use cocoa powder in a brownie or cookie recipe, it gets a bit trickier as each ingredient works with a specific leavening agent. When looking at a recipe, it simply says “cocoa powder” and doesn’t specify which type, relying on what the other ingredients are will tell you which one to use.
When a recipe calls for baking soda, most of the time, recipes will want you to use a natural cocoa powder. The acidic cocoa powder will react with the alkaline baking soda to create lift in your recipe.
When a recipe calls for baking powder, most recipes will have you use Dutch-processed cocoa powder. This is simply because of how each of them reacts with the leavening agent.
Try this recipe with cocoa powder:
Now that you’ve learned everything there is to know about cocoa powders–consider yourself a professional and get to baking!
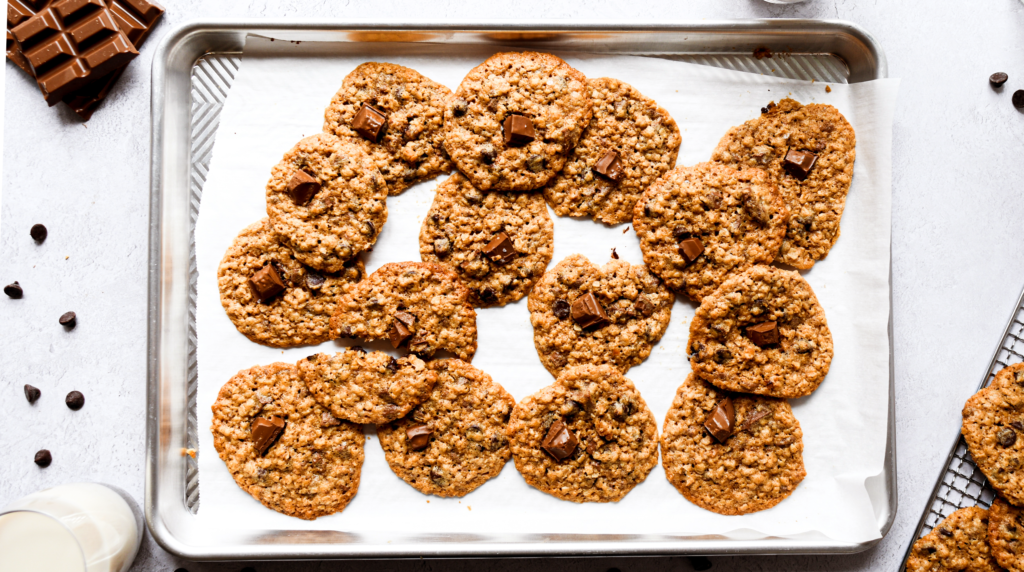
Did you know that the classic chocolate chip cookie is over 80 years old? A wonderful woman named Ruth Wakefield created the original recipe for our beloved treats in the 1930s! I think we can all agree that chocolate chip cookies are completely delicious no matter what… but are chunks better than chips? Let’s dive into why that might be true!
The Science of the Best Chocolate Chip Cookie
When it comes to baking the perfect cookie you need: flour, sugar, butter, egg, and chocolate of some sort. While the ratios of ingredients determine the texture and consistency, or just how chewy, thick, thin or crispy the cookie may be, the type of chocolate you use in them determines your entire cookie experience.
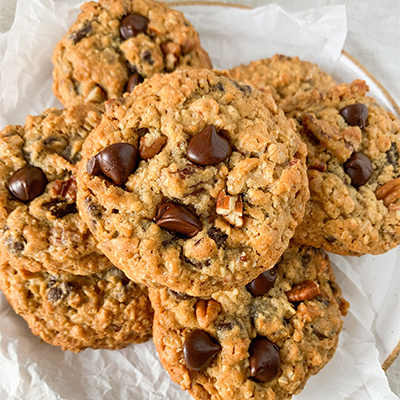
Chocolate Chips
Let’s begin with the good ol’ chocolate chips! Chocolate chips are small teardrop shaped chocolate drops and don’t lose their shape once baked. Hence, why they are specifically made for baking. They’re meant to withstand even the highest of heats. So no matter what temperature you bake them at, they will always maintain their little drop shapes, making them ideal for cookie dough. Standard chocolate chips have a higher sugar content and lower cocoa butter content than chocolate bars. They offer a much sweeter taste, making them great for snacking on their own.
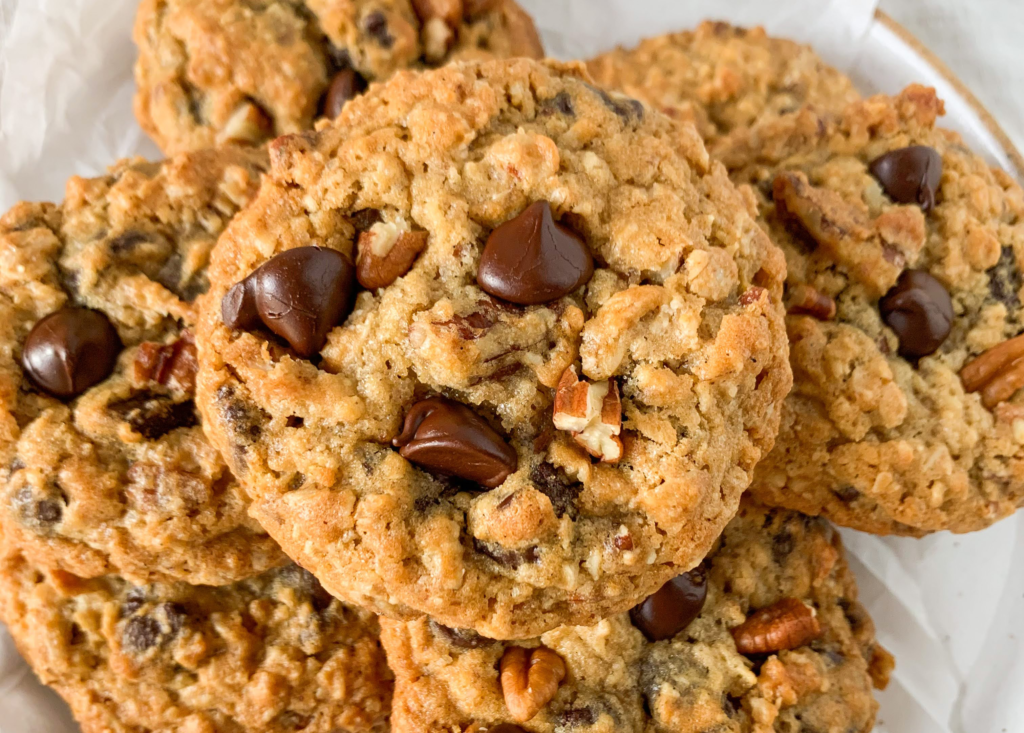
Chocolate Chunks
Chocolate chunks on the other hand melt smoother and more evenly, creating deliciously decadent pools of gooey chocolate pockets. Chocolate chunks, like baking chocolate for example, are generally of higher quality, resulting in a much more decadent and lavish treat. If your cookie dough contains a significant amount of sugar, opt for a good quality semi-sweet or bittersweet chocolate chunks for perfectly rich cookies.
Choosing Your Recipe For The Best Chocolate Chip Cookies: Chips or Chunks?
With all of your newfound knowledge about chocolate chip & chunk cookies, it’s time to decide which type of cookie recipe you will be bringing into the kitchen for your next gathering or to satisfy your own chocolate craving. Whether you use our Organic All Purpose Flour, or a Gluten Free alternative, Arrowhead Mills products will give you a delicious final result – no matter what kind of chocolate you choose!
Check out this video comparing chocolate chunks vs chips:
Baking soda is a commonly mystifying ingredient in the baking world. What exactly is it? Is it the same thing as baking powder? Is it okay that it’s been in my pantry for two years? If you have these questions, don’t worry. We once had them too.
What’s baking soda used for?
Baking soda, or sodium bicarbonate, is used as a leavening agent in many cakes, breads, or cookies. It make doughs airier and less dense.
The leavening effect works by combining baking soda with acidic ingredients, like buttermilk or yogurt, to create a reaction.
While baking soda is a key ingredient to help batter rise, it’s not the only option to help your batter rise.
Does baking soda go bad?
Baking soda has a shelf-life of 18 months, but it’s not quite as cut and dry as reading the expiration date.
Technically, eating expired baking soda won’t hurt you, so you don’t have to worry about falling ill from a cake gone wrong.
However, if baking soda has gone bad, it won’t work very well. Using baking soda that’s past its prime could result in baked goods being denser and flatter than expected.
You usually won’t be able to tell if the soda has gone bad just from looking at it, but a quick experiment can let you know.
How to test if baking soda has gone bad
The process is simple. Baking soda works to expand dough by reacting to acid, so to see if it works, combine a small amount of the soda with an acidic ingredient. Here’s what we’d do:
Take about 1 tablespoon of baking soda and place it into a bowl.
Add a splash, about 2 teaspoons, of an acidic liquid. We recommend lemon juice or vinegar.
Watch the reaction: if the baking soda and liquid begin to fizz then your baking soda is fine to use. If there is no reaction, then it’s time to throw it out and consider alternatives.
What to do if your baking soda goes bad
If you’re too busy to go to the store but find your baking soda is no longer active, don’t worry too much. According to Healthline writer Ansley Hill, there are some great alternatives:
Baking powder. Baking powder is a mixture of baking soda and cream of tartar. It’s not quite as strong as baking soda but it’s a simple substitute. For every teaspoon of baking soda you need, use 3 teaspoons of baking powder.
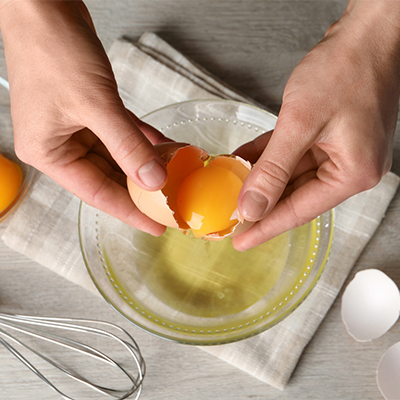
Whipped egg whites. If your recipe already calls for eggs, then simply divide the whites and whip them. They’ll provide an airy texture to mimic the baking soda. If the recipe doesn’t call for eggs, then lessen other liquids. For instance, if you use two tablespoons of egg whites, then leave out the two tablespoons of milk.
If neither of these options work for you, then consider just leaving it out. Your baked good may be slightly denser, but it will still have the same delicious flavor.
Check out this video on baking powder vs baking soda:
If you enjoy baking, you’ve probably used baking soda and baking powder a time or two. They are often essential ingredients that can help bread or sweets rise, making baked goods taste deliciously fluffy.
Even if you use baking soda and powder regularly, you may be curious about what they are made of. Keep reading to learn the difference between the two and when to use what!
Baking soda, or sodium bicarbonate, is an alkaline salt that creates carbon dioxide when mixed with acid. In turn, carbon dioxide allows what you are making to rise or expand.
Baking soda must be added to a dough containing acidic ingredients, such as cocoa or buttermilk. As a salt, recipes that call for baking soda will generally call for less salt as well. Baking soda also helps foods brown, so it’s a great ingredient to get that perfect golden look on your baked goods.
Baking soda has a shelf life of about 18 months. If you want to test if it’s still good, simply throw a spoonful in with vinegar, lemon juice, or something else acidic. If the baking soda fizzes, it’s still good!
What is baking powder?
Baking powder has sodium bicarbonate in it too, but it also includes two other ingredients, cream of tartar and cornstarch. Baking powder is a good option for baking when the mixture doesn’t have any acidic ingredients in it.
Some baking powders are double acting, which means that the powder will expand the dough once added to the mixture, and then again, in the oven.
Baking powder lasts up to a year. To see if your baking powder is still good, add a spoonful in with some boiling water. If it foams or bubbles up, it’s still good and ready to use!
Choosing between baking soda and baking powder
Baking soda and baking powder often go hand in hand. Sometimes, recipes will call for a bit of both.
If you’re deciding between the two, consider if your recipe has acidic ingredients in it. If it does, then consider using baking soda or a bit of both. If it doesn’t have any acidic ingredients in it, then it’s best to stick with baking powder.
Baking is often a science, but learning a bit more about what each ingredient can do goes a long way!
Substitutions
Sometimes, we don’t have quite what we need, but usually, we can still make it work!
If you need baking soda, you can use baking powder. Baking soda is about 3 times stronger than baking powder, so you’ll want to use about 3 times as much baking powder in your recipe.
If you need baking powder, substitute with 1/3 the amount of baking soda and 5/8 tsp cream of tartar.
Need self-rising flour? Self-rising flour is flour that already includes baking powder and salt. To make your own, simply add 1 1/2 tsp baking powder and 1/4 tsp salt for every cup of flour.
Try it out in your kitchen
Ready to see how baking powder and baking soda will affect your dishes? Try out some of our sweet treats listed below. Happy baking!
Our go-to reverse creaming method that will change the way you bake forever!
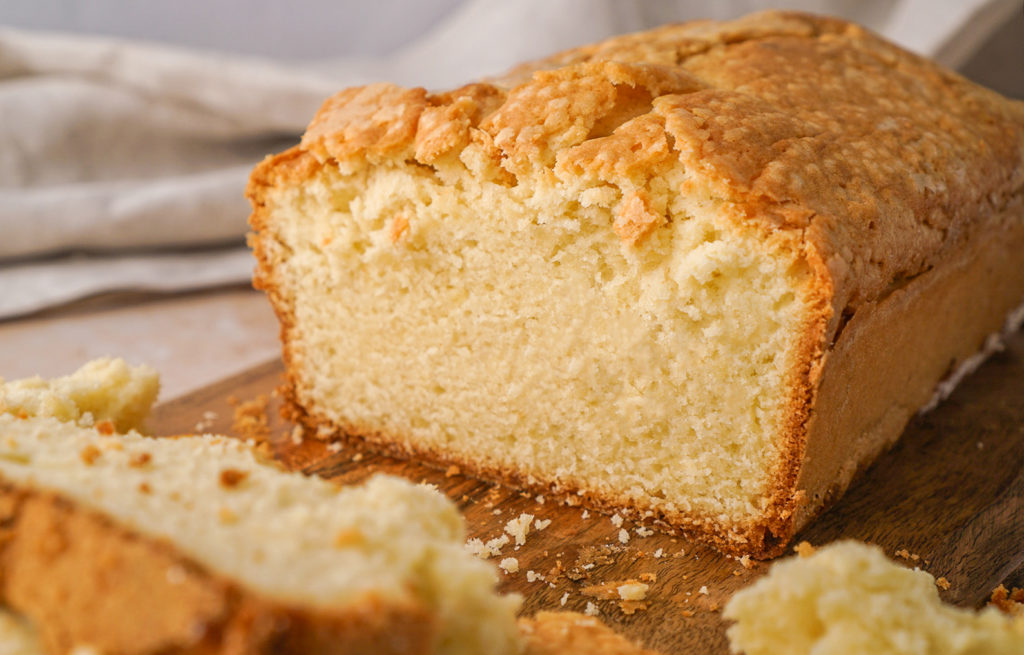
Most of us have heard about creaming butter and sugar, right? If you haven’t, this refers to beating together room-temperature for a light and fluffy butter and sugar mix. This process creates tiny air pockets in the batter that makes cakes rise as the whipped air bubbles expand during baking. But what if we told you there’s an easier, more efficient way to achieve the same beautiful cake? Keep reading to find out our preferred method of creaming butter and sugar!
Reverse creaming is a simple method that involves beating softened butter into dry ingredients instead of just sugar. The traditional creaming method and reverse creaming method produce quite similar results. Both produce a texture that’s light and moderately fine, but there are some subtle differences.
The traditional creaming method creates cakes that are a little more fluffy and have a slightly more open crumb. It also produces cakes that have a domed top due to the extra air beaten into the batter. Reverse creaming, on the other hand, produces flatter cakes with a velvety texture and even crumb — perfect for layered cakes!
Cakes made with the reverse creaming method have a more delicate texture because the butter coats the flour, which prevents any gluten from forming early on. We prefer this method for all these reasons, not to mention it’s much easier and almost impossible to mess up. While there are certainly recipes that call for reverse creaming, most recipes do not. Don’t worry, though — you can substitute this method with any recipe that calls for traditional creaming!
How Do You Do The Reverse Creaming Method?
Reverse creaming is quite easy, in fact. With just a few simple steps, you’ll get that perfectly smooth batter everyone knows and loves! Here’s a step-by-step guide to this incredibly easy baking technique that will change your life forever.
Step 1
Start by combining all the dry ingredients and sugar into a stand mixer or large mixing bowl.
Step 2
Beat cubed room-temperature butter into dry ingredients until it resembles a coarse meal. We recommend using a stand mixer, but a hand mixer will do just fine. If you use a hand mixer, it may just take longer to reach this stage.
Step 3
In a separate bowl, whisk together all the wet ingredients. Add half the wet ingredients into the dry and mix until just combined.
Step 4
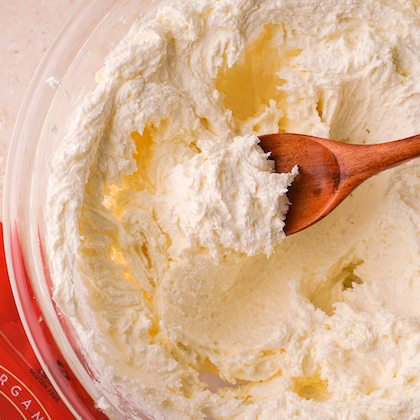
Add remaining ingredients and beat on medium speed until light and fluffy (approximately 2 minutes). The batter should result in a smooth, silky texture, and a light yellow color.
Step 5
Bake based on the directions of the recipe!
That’s it! Seems simple enough, right? Go ahead and give it a try! With its straightforward steps and remarkable outcomes, the reverse creaming method is your ticket to flawless cakes and elevated creations. Let us know if there are other baking techniques you’d love to learn more about.
Learn more about creaming butter and sugar in baking:
What you have to know about storing room temperature butter and how to safely do so.
If you’re here, you’re most likely wondering if it’s safe to leave butter on the counter or not. Leaving butter at room temperature has been quite the debate, and the internet seems inconsistent on this topic. But, if you’re like us, you love the idea of readily available softened butter for your morning toast. So, we went digging to find the answers, and here’s what we found.
What Do Food Scientists Have To Say?
Unlike its dairy counterparts, the SFS (State Food Safety) doesn’t consider butter to be categorized as a TCS (Time/temperature Control for Safety) food. This is because most butter goes through pasteurization, which heats liquids at high temperatures for short amounts of time and kills harmful bacteria. Butter also consists of at least 80% fat, and bacteria needs water to grow. Since butter is mostly fat, it creates a barrier that makes it almost impenetrable to bacteria. Another factor determining how long butter is safe to be left on the counter is the presence of salt. Salt acts as a preservative because it reduces the activity of water in food. We know that water is essential in the growth of bacteria, so without salt, we’re leaving our butter open for business for these organisms.
How Long Can I Store Butter at Room Temperature?
This topic is where things get tricky, and the internet says many different things. Some say butter can only be left out for two days, others say 1-2 weeks, and others say far beyond that. So, we searched high and low to find trusted sources explaining how long butter can be stored at room temperature. During our scavenging, we found the reports of an experiment that tested the presence of yeast, mold, and bacteria in butter left at room temperature. Over 21 days, butter was kept around 72℉ and inspected under a microscope. After three weeks, the lab reported that the butter had an increase in bacteria but was still within the safe zone to consume. We also found another extensive study that tested the taste of butter after being on the counter at room temperature for varying amounts of time. Salted butter’s flavor did not change significantly after seven days, but unsalted butter started to change after four. So, with that information, even if it’s safe to consume, it may not always taste the best, and we say trust your gut. If your butter looks suspicious, has a distinct smell, and tastes off, don’t think twice — throw it out! Otherwise, butter seems safe to consume even after a significant amount of time if stored properly.
So, How Do I Store Butter at Room Temperature Properly?
Okay, we know now that butter is good for at least 4-7 days and upwards of 3 weeks. So what can we do to ensure it stays that way? Food becomes spoiled when exposed to light, heat, and oxygen. You can combat these factors by storing your butter in a clean, airtight, opaque container like a butter boat, bell, or butter dish. Keep it away from food that could potentially contaminate it and away from direct sunlight or other heat sources. Butter should only be left on the counter if the room temperature stays below 75℉. We also recommend considering how much butter you use within a few-day window and only leaving enough out to prevent wasting. Otherwise, we recommend alternative ways to store butter.
How Can I Tell When My Butter Is No Longer Safe To Consume?
An easy way to tell if your butter has started to go bad is by looking at it. Butter going rancid will change color from off-white to yellow and brown. It will also have a change in texture. If you see mold, you should immediately throw it out. But if you can’t tell by looking at it, smell it. Rancid butter will start to smell like sweaty feet, rotten cheese, or even vomit. If all else seems fine, the final test is to taste a small portion. Butter that has gone bad will have a sour-bitter taste. If the butter passes all these tests, you can feel confident that it’s still safe to consume.
The Take-Away
If you’re new to storing room-temperature butter, your safest bet is simply to follow our recommended practices. Use salted butter instead of unsalted, and make sure to store your butter properly. “Safety first” should always be your priority when handling food. Trust your gut. If it doesn’t feel right, err on the side of caution.
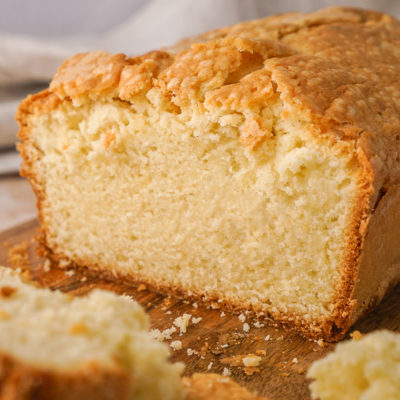
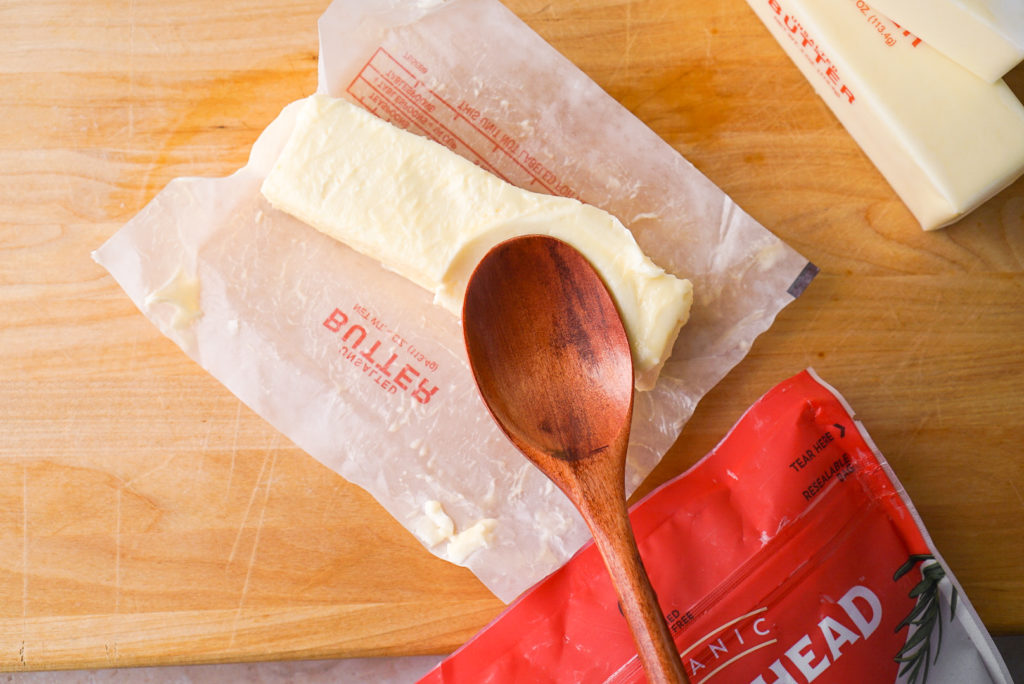
Tips and tricks on how to soften butter quickly so you can get to baking sooner
Many baked goods require butter to be at room temperature, most likely for creaming butter and sugar, so it can be frustrating when you don’t plan ahead like you were supposed to. The good news is that there are many tips and tricks to help you soften your butter quickly so you can get to baking sooner. We’ve gathered all our favorite methods to get softened butter in no time. So just pick your favorite and get baking!
Our favorite methods to soften butter:
1. Countertop
Take your butter out of the fridge and leave it on the counter for 1-2 hours. This method is the most hands-off and consistent but also the most time-consuming. We recommend this method if you have time, but if you don’t, there are plenty of other innovative ways to skip this step.
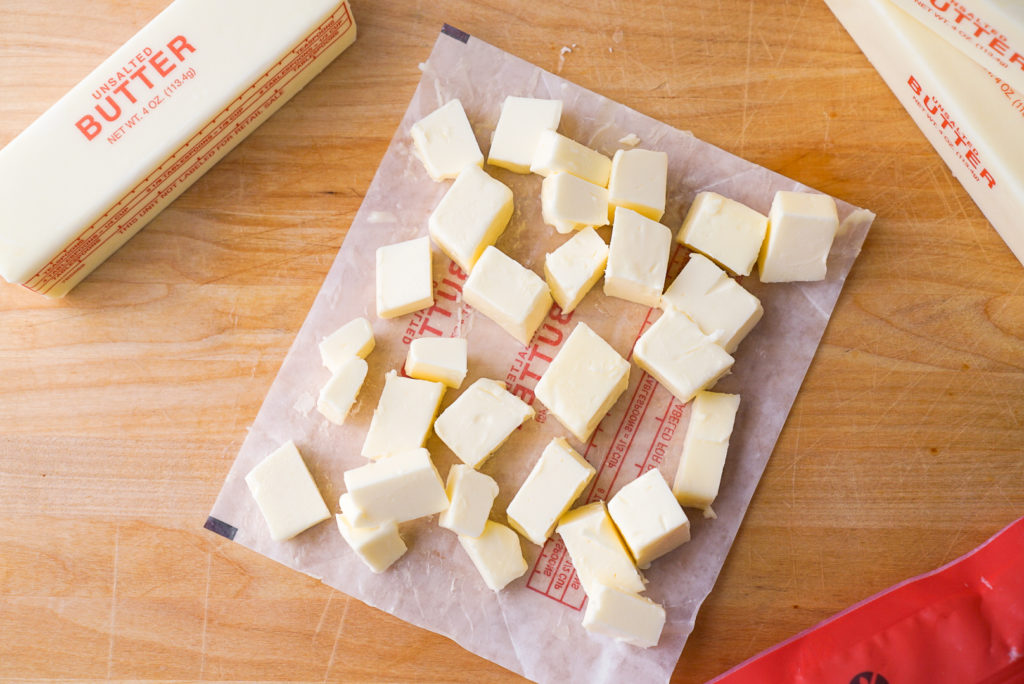
2. Cube/Grate
All you have to do is cut the butter into small cubes using a knife or bench scraper. The smaller you can make your pieces, the faster they’ll soften. We like to cube our butter before doing anything else. It only takes 15 minutes to soften cubed butter, so it’s a perfect time to prep anything you may need. You could also grate your butter, but it risks the chance of melting instead of softening.
3. Microwave
Place a stick of butter on a microwavable plate and microwave in 10-second intervals while rotating the butter each time. This method seems to be the most popular, but there’s a price to pay with such a speedy method. Microwaving your butter will soften in some spots, melt others, and have no change in other areas. It’s wildly inconsistent, but hey, if it works, it works.
Microwaves can turn into a melted mess quickly!
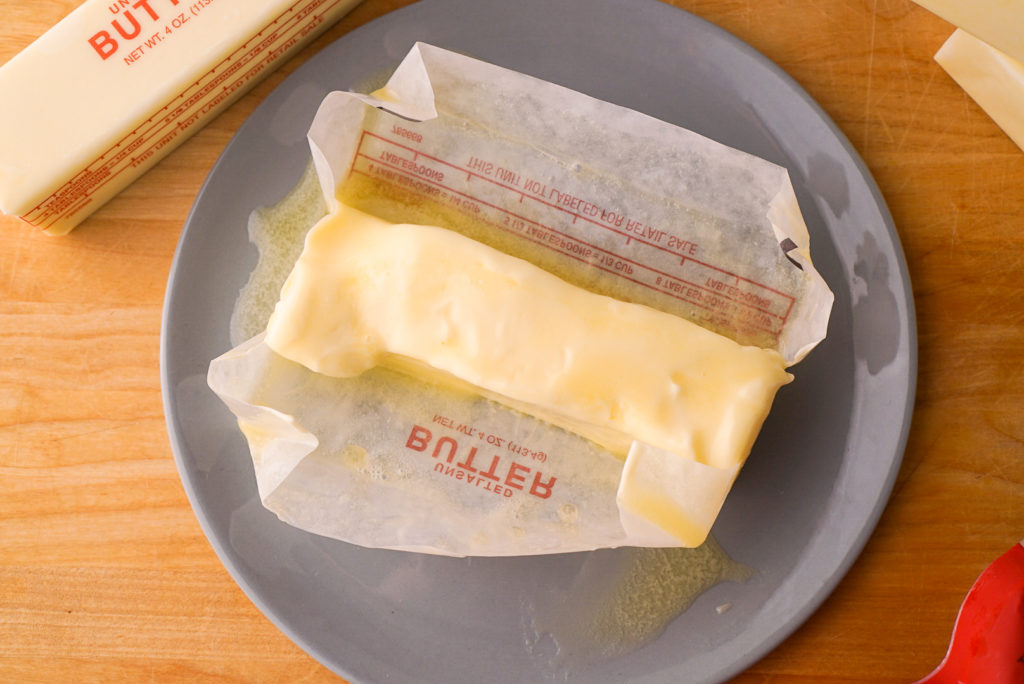
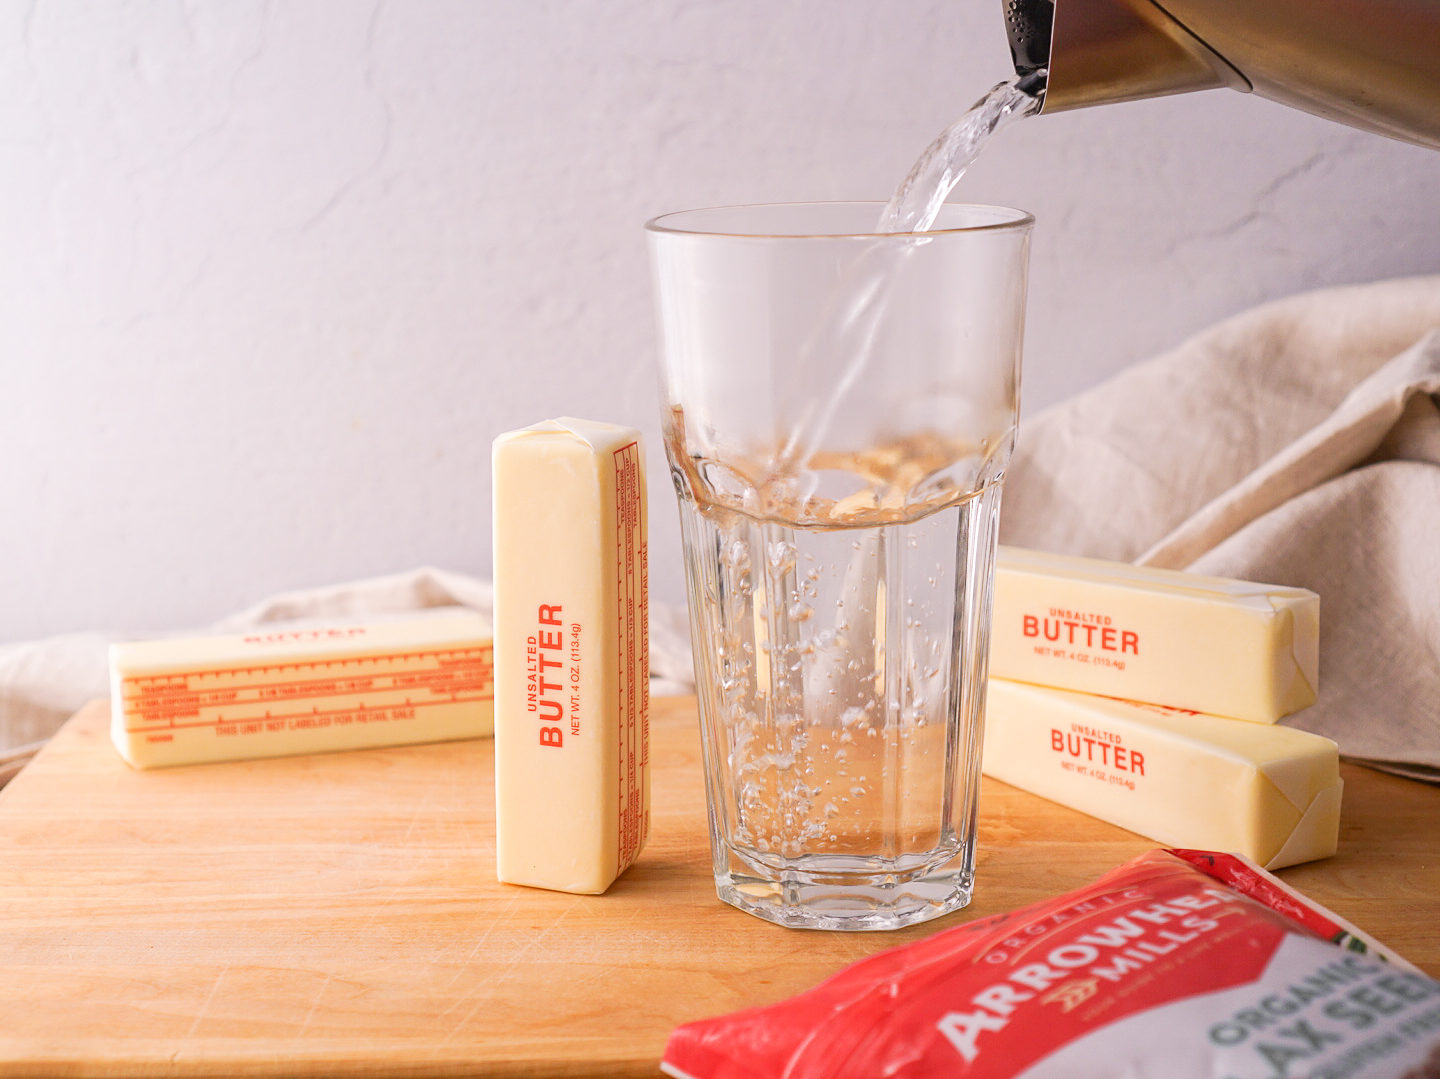
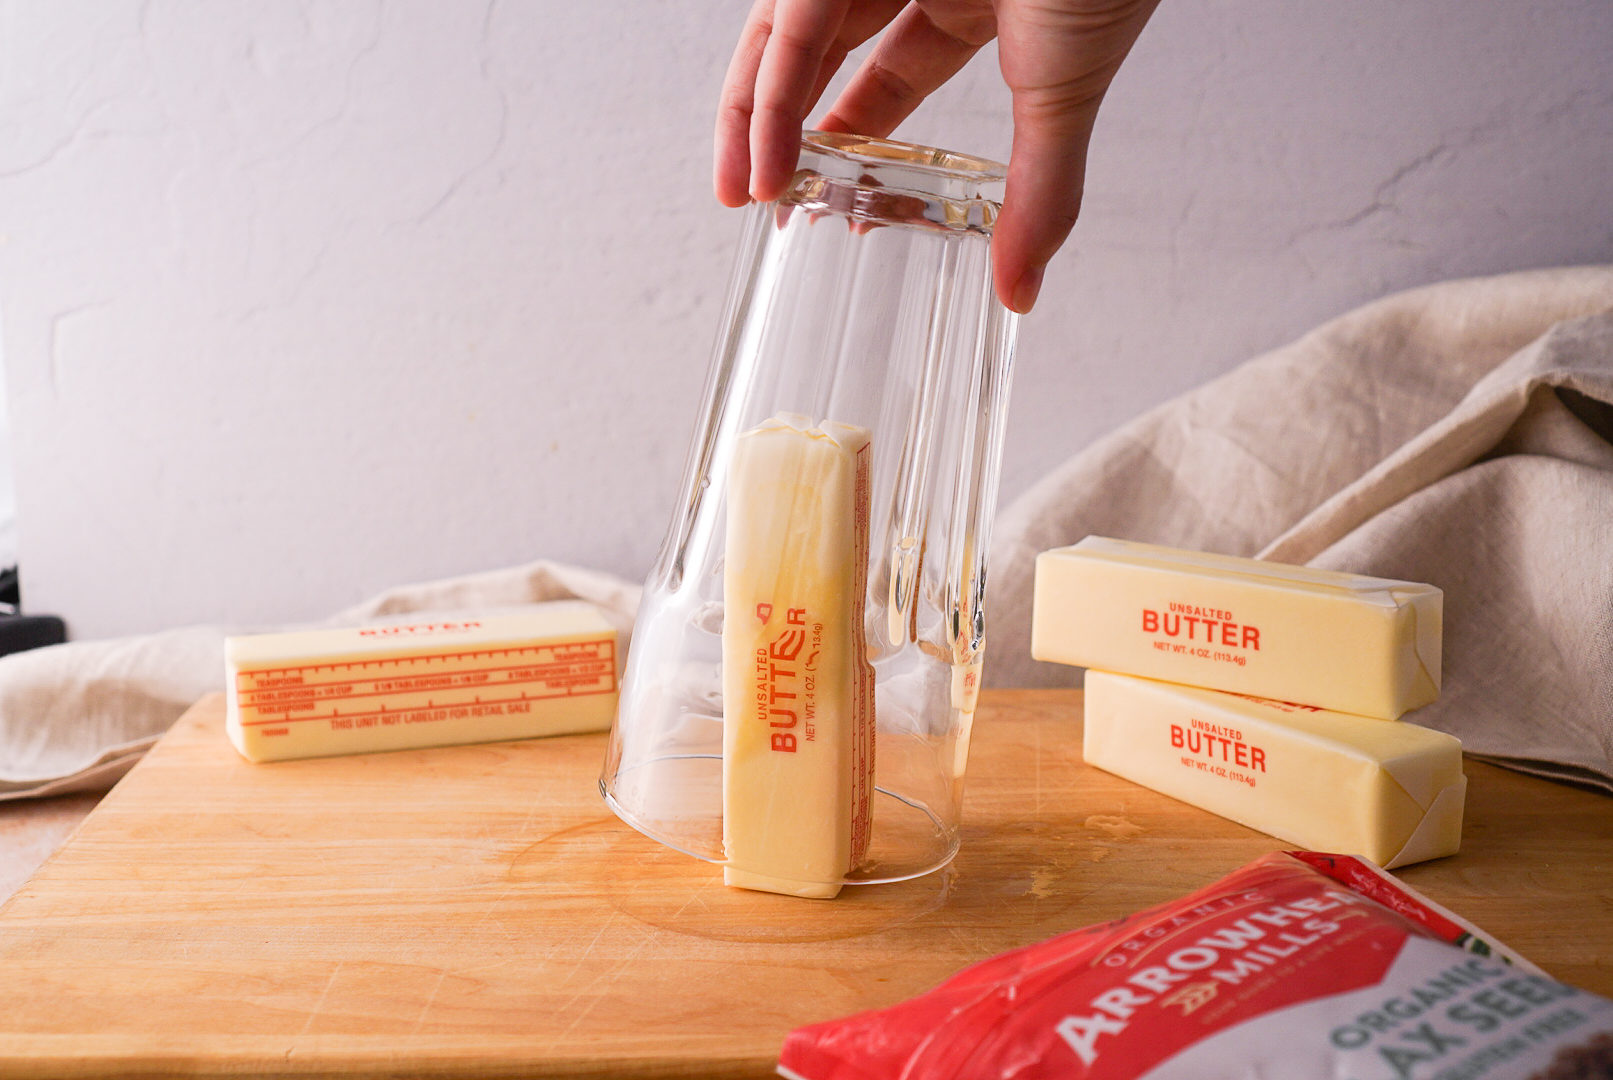
4. Cup Steam
Fill a large microwaveable cup with water and microwave on high for 1 minute. Pour out the water and use the cup to cover the butter. Allow the butter to steam for 5 minutes. One caveat about this method is the outside may be the perfect temperature, but the core is still cold, and after 5 minutes, the cup is no longer hot enough to soften the rest of the stick.
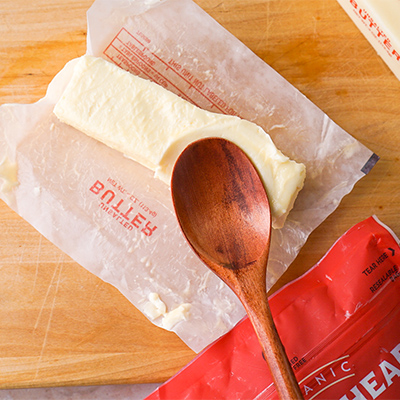
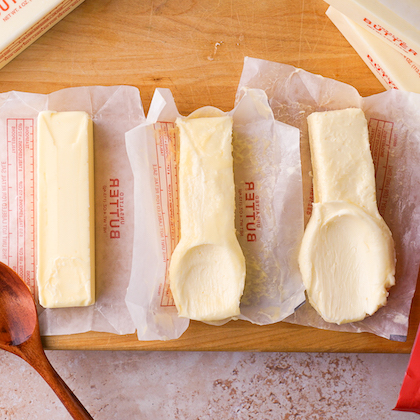
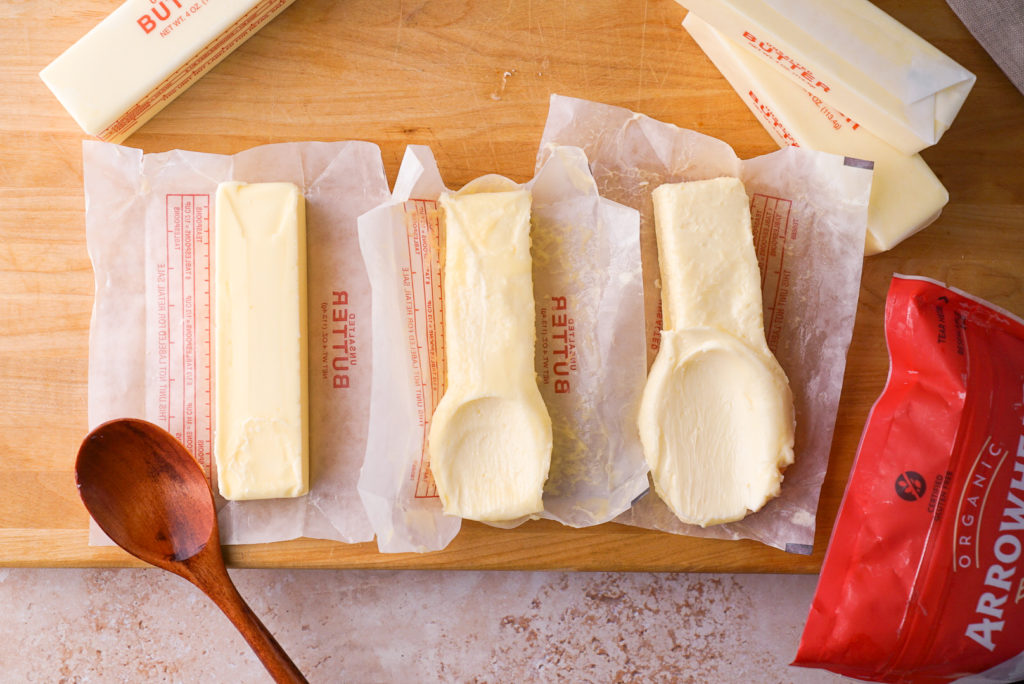
5. Pound
If you have some unresolved anger, we recommend this method. Just place butter in the center of parchment paper or plastic and wrap it loosely. Grab a rolling pin and pound, pound, pound. The force will flatten the butter and allow it to soften faster. This method is great, especially when making croissants.
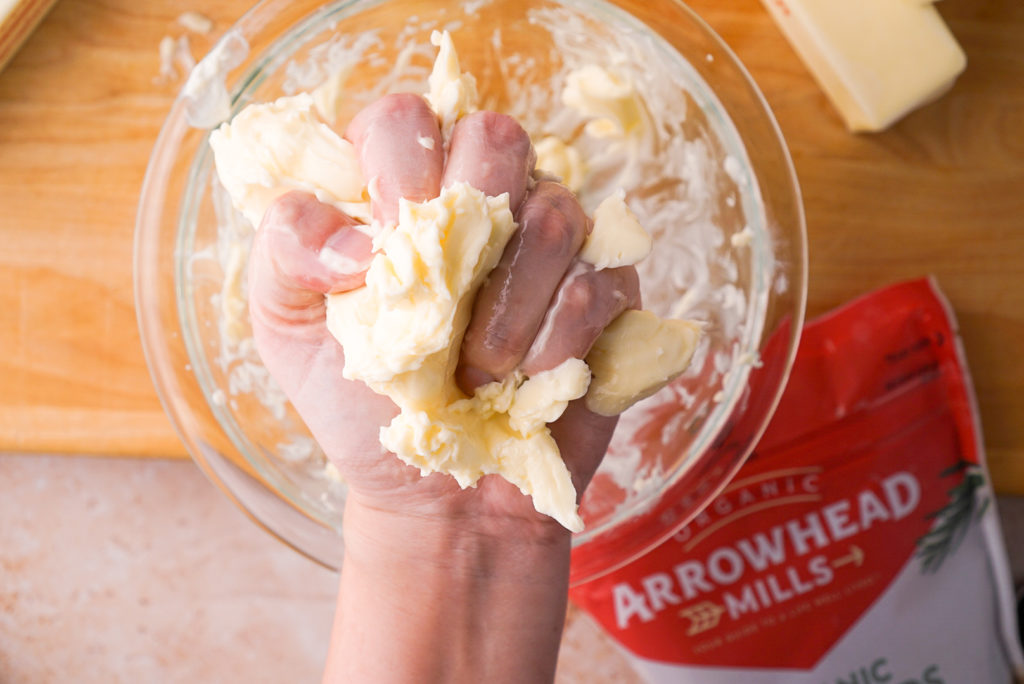
6. Knead
We love this method because it’s the most fun and hands-on. Using clean, dry hands, gently knead the butter on a clean, dry surface until it’s pliable. The warm temperature of your hands will gradually increase the temperature of the butter. The unfortunate news is that it’s also the messiest. The price to pay for an enjoyable experience.
Kneading is fun, but also one of the messier options.
7. Body Temperature
Just like kneading, this method uses your body’s heat to soften butter. Just place the wrapped, cold stick under your shirt and secure it under your waistband. Allow the butter to soften for a few minutes. Forewarning, though, your body will be shocked by the cold stick touching your warm skin.
So, there you have it! Our favorite tips and tricks to soften your butter in no time. If you have more questions about softened butter, like why butter temperature matters and how to know when your butter is at the right temperature, we recommend reading our extensive article on everything you need to know about creaming butter and sugar.
A how-to guide to upgrading your baked goods with this simple yet critical technique.
You don’t have to be a professional baker to understand that creaming butter and sugar can make or break your recipes. Without creaming, your cakes will never rise to their full potential. Beating together softened butter and sugar is why your cakes puff up beautifully. It also determines whether a cookie is flat and chewy or more cake-like. So if you’re looking to upgrade your baked goods, It’s time to master this critical technique.
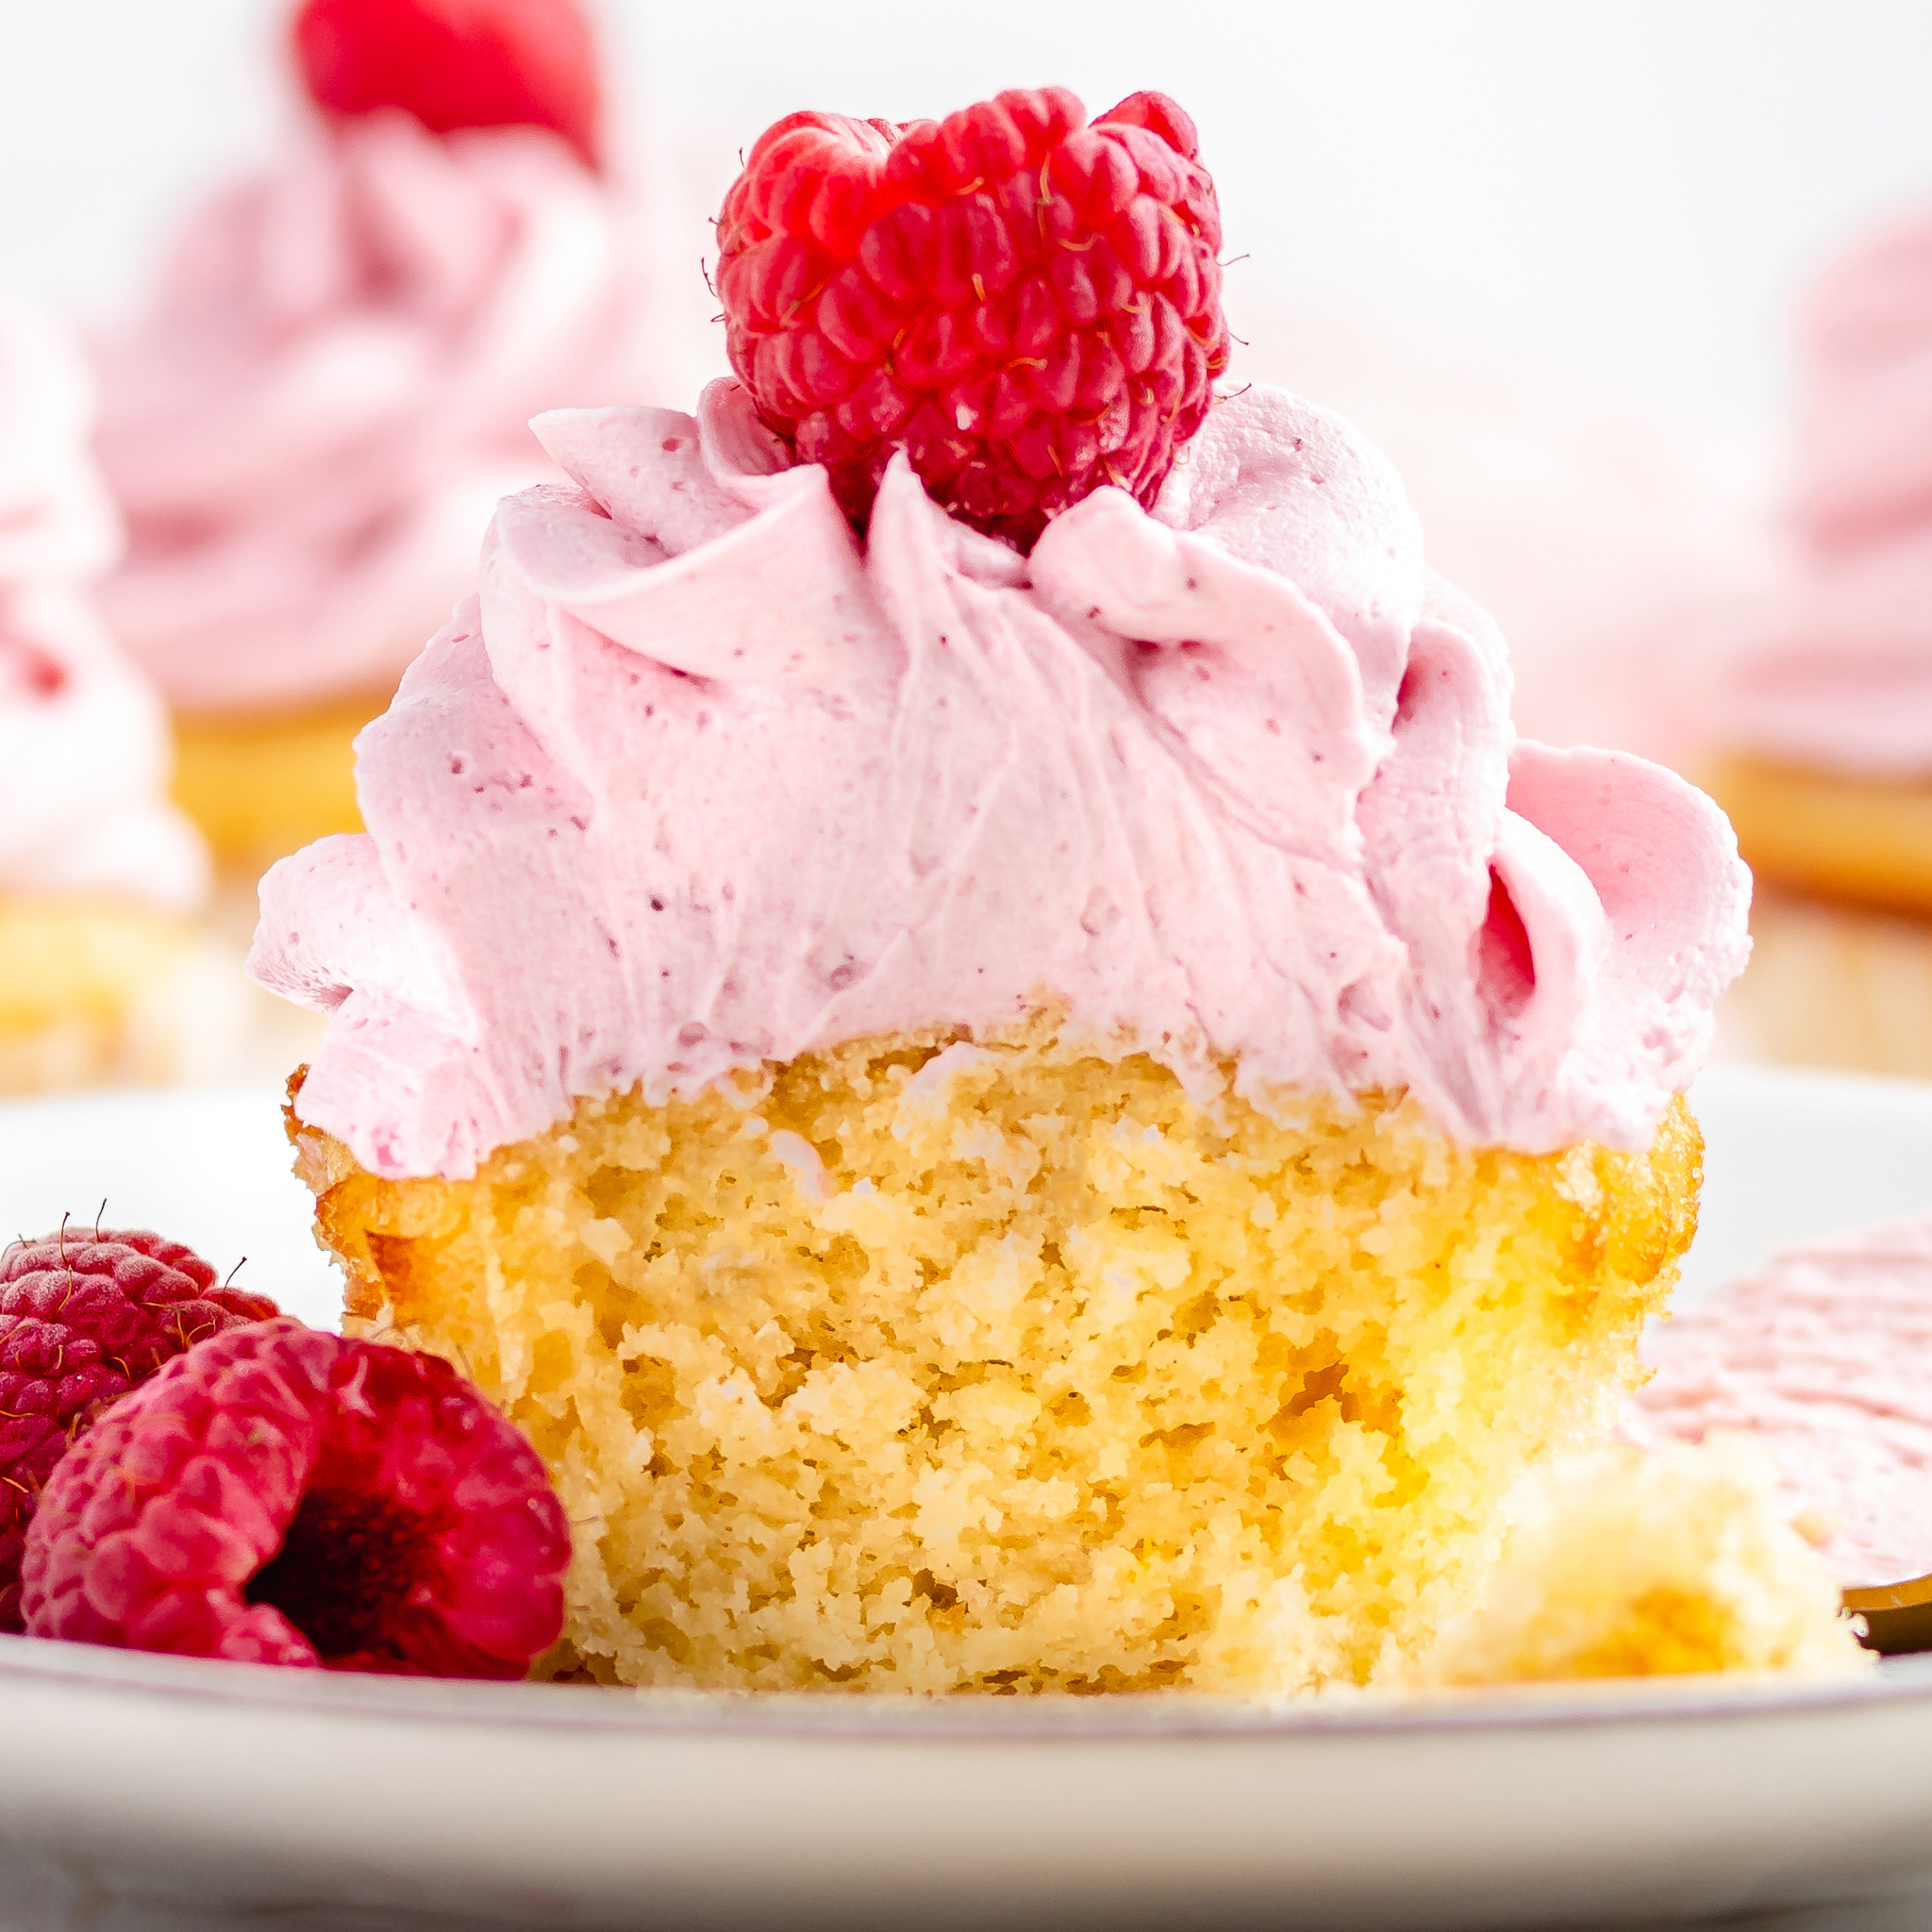
Vanilla Cupcakes with Hibiscus Frosting
Creaming butter and sugar is usually the first step in cake recipes. “Creaming” refers to beating softened butter and sugar until the sugar dissolves, creating tiny air pockets in the batter. Once baked, these pockets of trapped air expand and puff up cakes, create texture, and provide structure. While using a stand or hand mixer is easiest, you can certainly do this with common kitchen tools if you’ve got arms of steel.
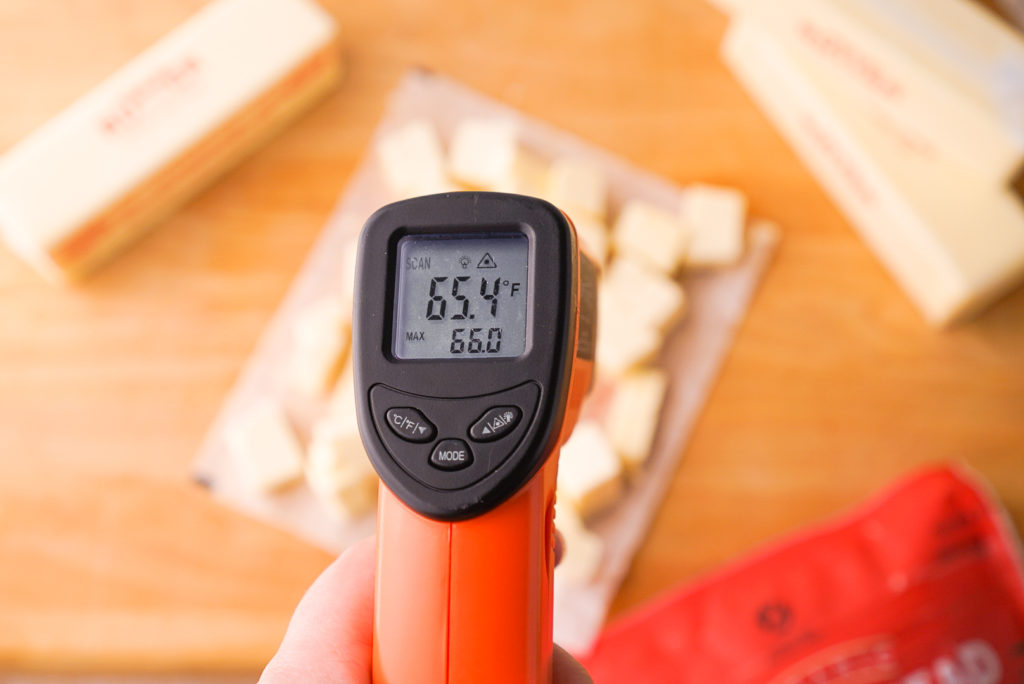
How do I know my butter is at the right temperature?
Recipes will either say softened or room temperature when referring to creaming. Those two words are used interchangeably for this method. While room temperature usually refers to the average 73℉ home, the ideal butter temperature for creaming is between 60-65℉. You’ll know it’s the right temperature when it feels slightly chilled and your finger leaves an indentation when pressed but doesn’t push through the butter quickly. If you forgot to take your butter out of the fridge beforehand, don’t fret. We’ve got some tricks up our sleeve that can help you soften butter quickly!
How to Cream Butter and Sugar:
Supplies
Softened Butter
Granulated Sugar
Stand mixer with a paddle attachment or hand mixer
Large mixing bowl
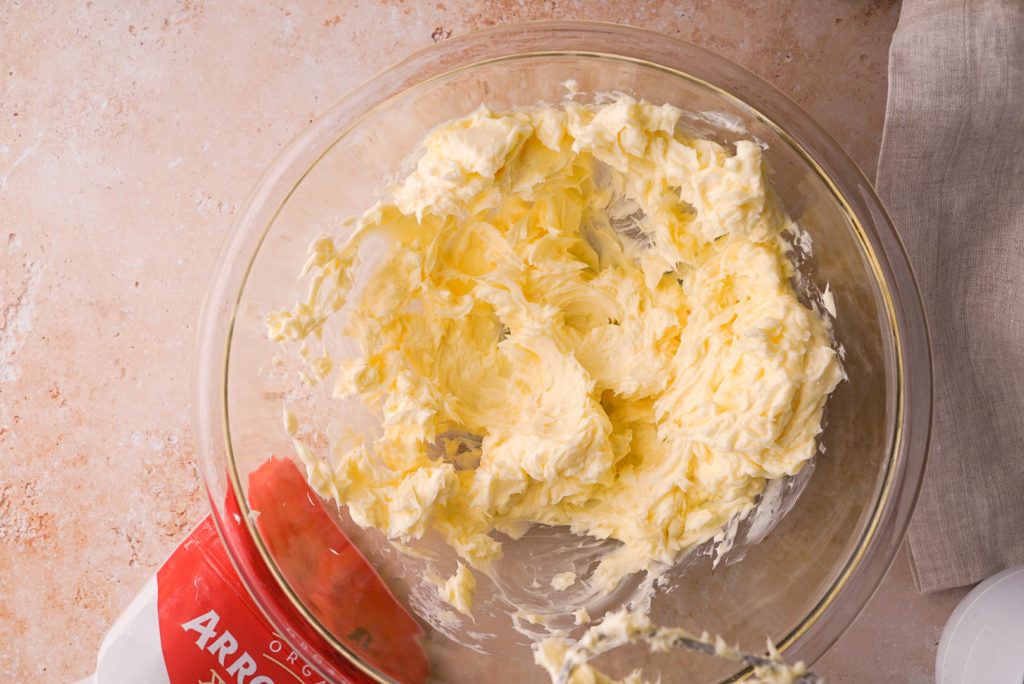
Step 1
Add butter to a large mixing bowl. Beat on low until the butter begins to soften and spread. You can also cut your butter into cubes before beating to help with this process.
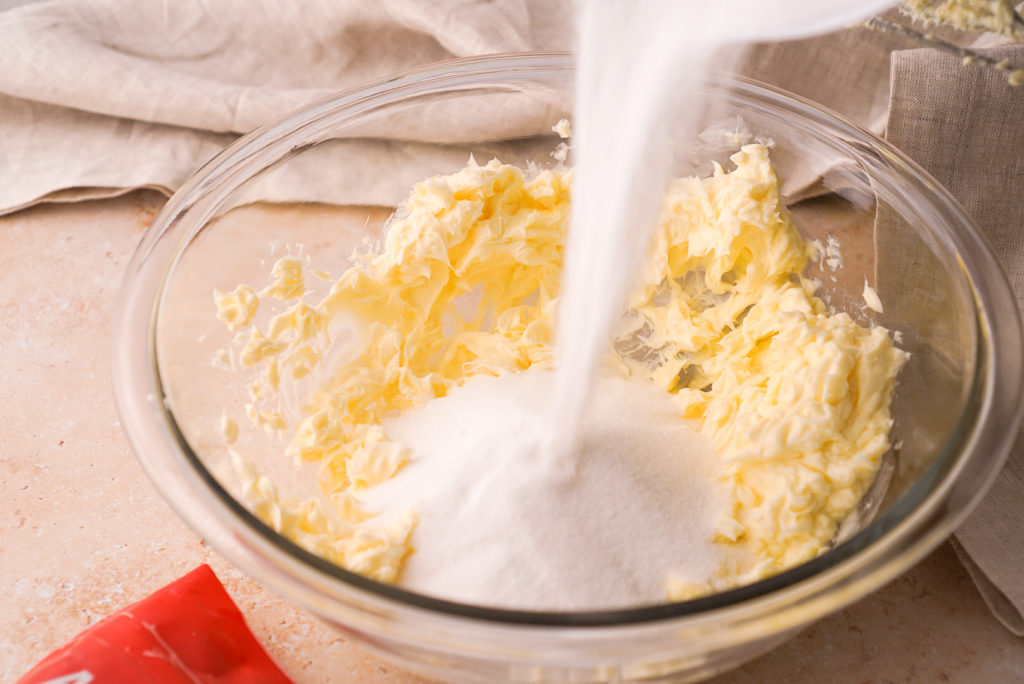
Step 2
Pour in the sugar and slowly increase speed to medium (level 6 on a KitchenAid stand mixer).
Step 3
Beat butter and sugar on medium speed until light in color, fluffy, and almost doubled in size. The sugar should also feel mostly dissolved. Scrape the sides of the bowl occasionally to ensure everything beats evenly. Adequately creamed butter can take up to 5-7 minutes, depending on the speed of your mixer.
That’s it! The creaming method doesn’t have to be complicated. With some understanding and patience, your baked goods will thank you for the extra effort. If you still have questions, that’s okay! We’ve got a comprehensive guide to everything you need to know about creaming butter and sugar.
While eggs are highly nutritious and contain many essential vitamins and minerals, some people cannot eat them.
What does this mean for baking? As we all know, eggs are essential for baking as they provide structure, leavening and add color to our baked goods! Well, for people who can’t consume them, there are many substitutions for eggs in baking, luckily. Substitutions that also contain good amounts of vitamins and micronutrients such as chia seed and flaxseed. Let’s dive into which substitutions are best for baking!
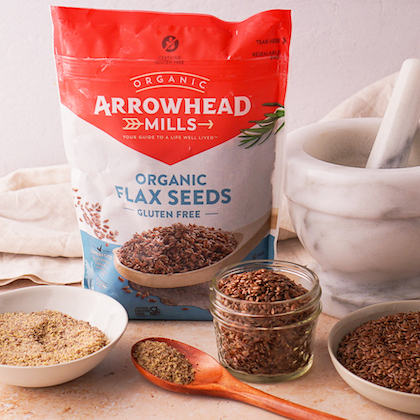
Number one: Flax seeds
Flax seed is a plant-based food that is all natural, vegan, GF, and can be added to many different meals and foods for extra nutrients. For example, oatmeal, yogurt, pancakes, breads, etc. Some people use it as a dietary supplement to increase their nutrient, fiber, and healthy fat intake. All you need to replace 1 egg in a baking recipe is 1 tbsp ground whole flax seed and 4 tbsps of water. Mix those two ingredients together and allow it to sit for roughly 10 minutes. It turns slightly thick and gooey like a real egg!
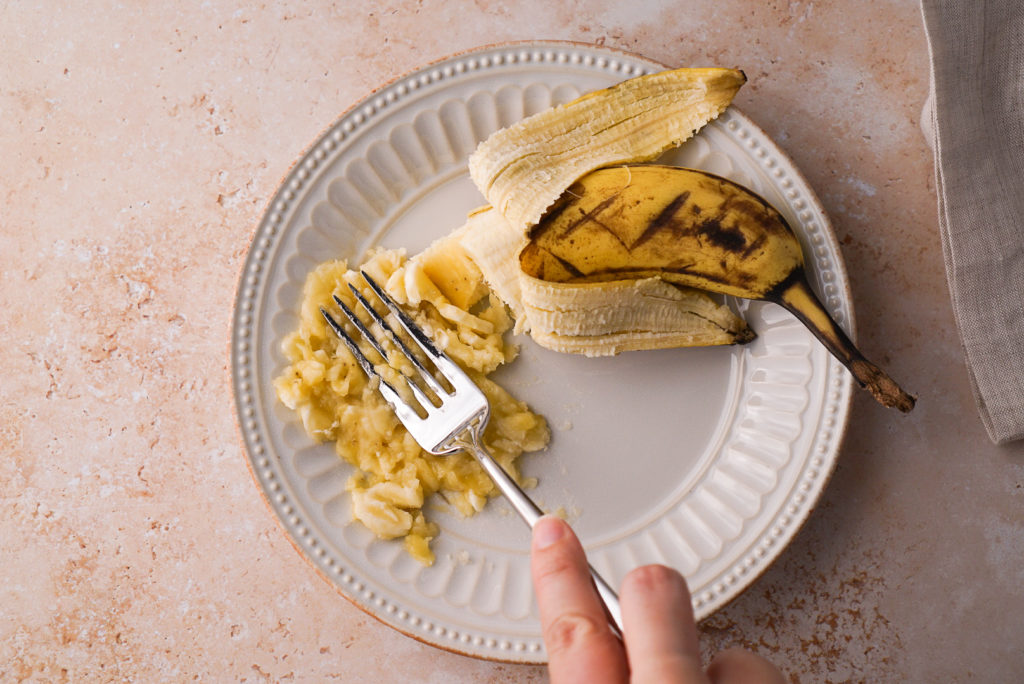
Number 2: Banana
Bananas are not only delicious but they are also rich in nutrients! Combine that with the wonderful banana-ey flavor and they serve an elevated purpose of egg replacement in baking–who knew?!
Once again, the texture slightly replicates an egg, with 1 mashed banana replacing 1 whole egg in baking recipes.
Number 3: Chia seeds
Chia seeds are a fantastic way of hitting your fiber goals for the day! They’re a great addition to yogurts and salads. Quite similar to flaxseed; chia seeds are really easy to add to many dishes and they’re also nutrient-rich as well! Essentially the same as flaxseed, you can create 1 egg by mixing 1 tbsp of chia seeds with 4 tbsps of water and waiting for several minutes before adding to your recipe.
Number 4: Aquafaba
What is aquafaba you say?! It’s actually the leftover liquid/brine from soaking chickpeas in water. Sounds kind of weird– but trust us, it’s amazing for baking! You can whip it up into meringues, pavlovas, make ice cream, use it to replace eggs in different baked goods, muffins & pancakes, etc. Replace 1 egg by using 3 tbsp of the liquid. Lightly whisk to aerate the chickpea brine before using. Just make sure you’re using unsalted, unflavored chickpeas!
Answers to the most common questions about creaming butter and sugar
Your cakes ended up dense and flat, but you have no idea why. You looked back on the recipe and did everything correctly, or so you thought. If the recipe said to cream butter and sugar, it’s most likely that the butter wasn’t creamed correctly. So, how do you cream butter and sugar the right way?
When a recipe says to cream butter and sugar, it’s telling you to quickly combine butter and sugar until light and fluffy. You do this by mixing softened butter and sugar with a stand or hand mixer at a moderately high speed. As the two ingredients whip together, the sugar starts to dissolve, creating tiny air pockets within the butter. These tiny bubbles of trapped air puff up cakes and other baked goods, creating lighter, fluffier, and moister desserts.
Creaming butter and sugar is an essential technique to master, especially when the recipe doesn’t contain any other form of leavener like baking soda or baking powder. It sounds like a simple task, but many factors can determine how well you’ve aerated your butter. So let’s get into the details.
Does the temperature of my butter matter?
The temperature of your butter is critical when creaming butter and sugar. Too cold, and your sugar won’t properly dissolve into your butter. Too hot, and your cakes will end up flat and greasy. The magical temperature of softened butter is actually around 65℉, slightly cooler than the ambient temperature of your home. When a recipe says to have butter at room temperature, they mean between 60-65 degrees Fahrenheit. Anything more or less than that, you start teetering on the side of possible disaster. You know your butter is at the right temperature when it’s slightly cool to the touch, and you can press an indentation with your finger without quickly going through it.
I forgot to take my butter out of my fridge!
You start making a recipe and realize your butter is too cold. What are you supposed to do? No worries, we’ve got some great tips on how to soften your butter quickly.
You could leave your butter on the countertop for one hour if you have the time.
You can place your butter between two sheets of wax or parchment paper. Then, press down on the butter with a rolling pin and roll it out once it softens.
You could grate your cold butter, making it easier to get to room temperature. Be careful, though; it can melt this way quickly.
You can pour boiling water into a cup and wait a few minutes. Then, dump the water and place the warm cup over your butter until it’s at the proper temperature.
Do I use salted or unsalted butter?
Salted vs. unsalted butter doesn’t change the effect of the creaming method. However, it does affect your baked goods’ final level of saltiness. Professional bakers always recommend using unsalted butter, so you have more control. If a recipe doesn’t specify, it’s most likely unsalted. You can reduce the amount of added salt in a recipe if all you have is salted butter.
Can I use any other fat other than butter?
The short answer is yes! You can undoubtedly use shortening, lard, or other fats. But, keep in mind that temperature is still critical. Other fats are also better or worse at trapping air which can result in different levels of texture in your final baked goods. Our suggestion is to experiment and have fun with it. Find which fat you prefer!
Does the type of sugar affect the final bake?
Yes, the type of sugar you decide to use will affect the final bake. The size of the crystals determines the amount and size of the air pockets it creates. Superfine sugar is perfect for cakes that call for a delicate texture. Granulated sugar seems to be the standard in most recipes, so that’s what we suggest. But castor and brown sugar also work well for this method. The only thing we don’t recommend using is powdered sugar.
Do I need to use a stand mixer?
You could certainly cream butter and sugar without a stand mixer. It will take a good amount of elbow grease, though. If you don’t have a stand mixer, a hand mixer will work just as well. If you don’t have either of those, that’s okay! Here’s how to cream butter and sugar using common kitchen tools:
Add your softened butter and sugar to a bowl.
Gently mash the butter with a fork until mostly combined.
Using a wooden spoon, mix until light and fluffy, scraping down the sides of a bowl with a spatula as needed.
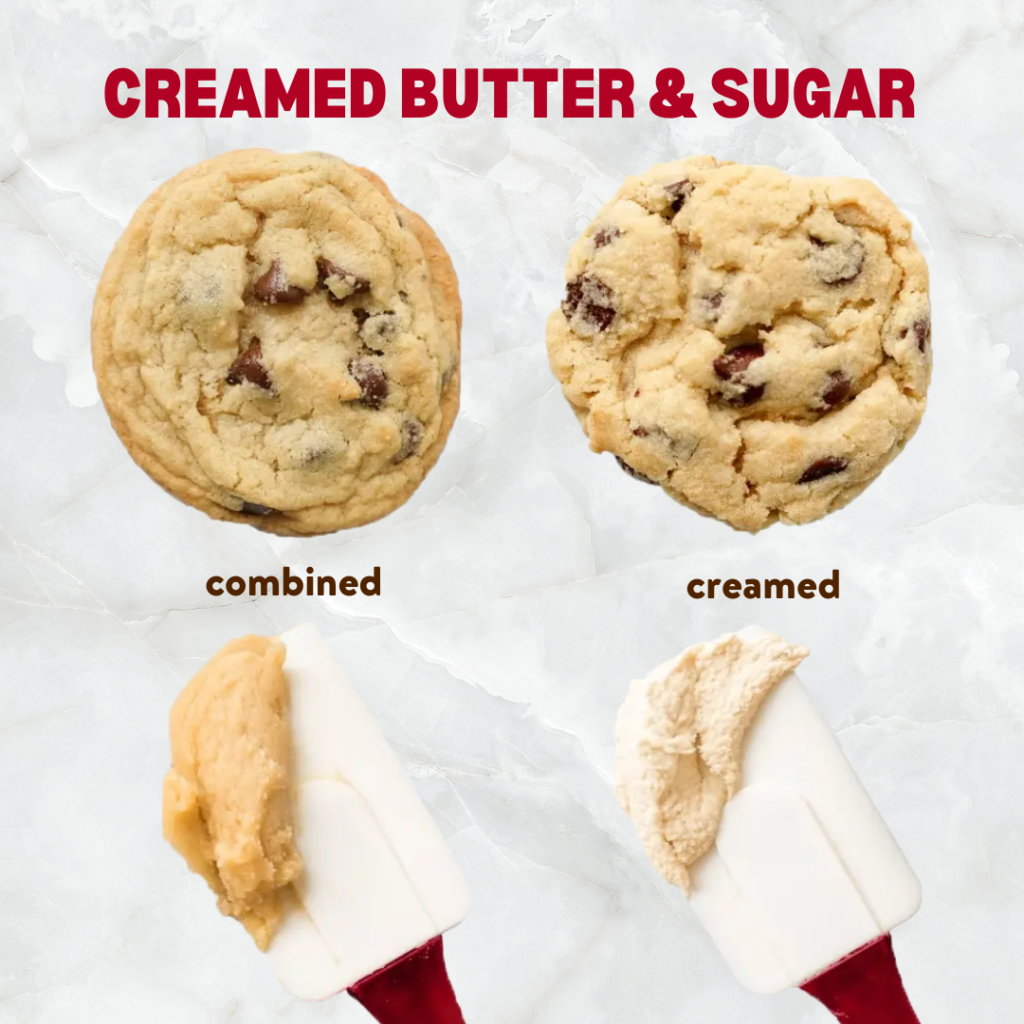
Do I cream butter and sugar for the same amount of time for cookies?
Ultimately, that’s up to you. The amount of creaming you do will determine the final texture. Creaming butter for longer will result in more cake-like cookies, whereas creaming butter for a shorter period will create a flatter, chewier cookie. Of course, both cookies are lovely in their own means, so it really depends on what you’re going for. That said, when baking a cake, we recommend creaming for a full seven minutes.
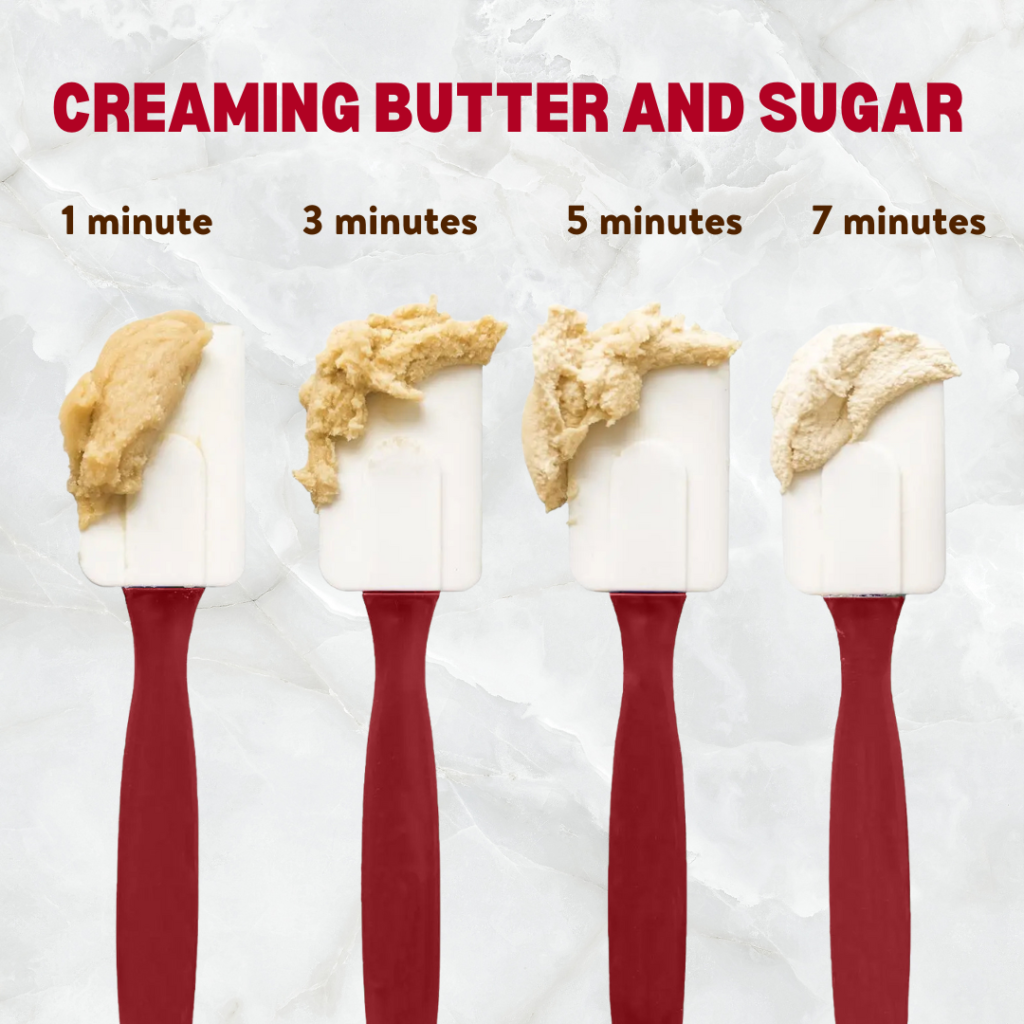
How do I know I’ve creamed my butter and sugar long enough?
Butter goes through phases when in the process of being creamed. It will go from dark yellow and grainy to very light yellow, fluffy, and the sugar will feel mostly dissolved. It’s better to know what stage you’re in vs. the amount of time you’ve spent creaming. This is because your mixer’s speed and the butter’s temperature will whip at different rates. Here’s how to tell what stage you’re in and the average time it takes to reach each one:
Phase 1 (1-2 minutes) Dark Yellow Grainy Dry Sand
Phase 2 (3-4 minutes) Slightly lighter in color Grainy Wet Sand
Phase 4 (7-8 minutes) Very light yellow Extra fluffy Sugar will feel mostly dissolved
Can you over cream your butter?
You sure can! You know you’ve gone too far when your butter surpasses the fourth phase and splits back into a grainy texture. If you’ve reached that far, you can add ground cinnamon and use that as a spread for toast or pancakes. Then, start over using new butter and sugar before continuing with your recipe.
Long story short, creaming butter is an essential technique every scratch baker should know. Convert your dense, flat cakes to moist, well-risen, professional-grade delicacies! All it takes is the right temperature, a little bit of patience, and some knowledge. Let us know how creaming butter and sugar has helped your baking!